Holiday Crafting: Sewing a Christmas Dress for an American Girl Doll
One of my favorite things about the holiday season is the opportunity to combine my love for crafting with Grace’s passion for her American Girl doll. This year, I decided to take our tradition to the next level by sewing a special Christmas dress for Sarah, Grace’s 1940s-era doll. What started as a simple idea became a delightful afternoon of creativity, bonding, and the satisfaction that comes from making something special with your own hands. I’m excited to share the complete process with you, including the materials, techniques, and step-by-step instructions for creating your own festive doll dress.
Materials Needed
Before we begin, here’s what you’ll need to create this beautiful Christmas dress:
- Fabric: 1/2 yard of red cotton fabric for the dress, 1/4 yard of white fabric for the apron
- Interfacing: Light-weight fusible interfacing for the apron
- Thread: Red, white, and green thread to match your fabric colors
- Elastic: 1/8 inch elastic (about 3 inches) for the waist
- Trim: Green ribbon (1/4 inch wide) and some small pom-poms for decoration
- Notions: Small buttons (red or green), fabric scissors, measuring tape, pins, and a sewing machine
- Pattern: American Girl doll dress pattern (I used a modified version of a simple A-line dress pattern)
Getting Started: Preparing the Pattern
For this project, I modified a basic A-line dress pattern to create a vintage-inspired Christmas dress. Here’s how to prepare:
- Printing: Print out the American Girl doll pattern pieces at 100% scale (do not scale to fit page). Tape the pages together according to the pattern instructions.
- Modifications: I extended the skirt length slightly and added a small Peter Pan collar. I also created a simple apron pattern that would complement the dress.
- Fitting: Before cutting fabric, I placed the paper pattern on Sarah to ensure proper fit. The last thing you want is to complete a dress only to find it doesn’t fit properly!
Cutting the Fabric
With the patterns ready and fitting confirmed, it’s time to cut the fabric:
- Fabric Preparation: Wash, dry, and iron your fabric before cutting to prevent future shrinkage.
- Layout: Place the pattern pieces on the fabric following the grain line markings. Pin the patterns in place.
- Cutting: Using sharp fabric scissors, carefully cut around each pattern piece. Mark any notches or dots indicated on the pattern.
Sewing the Dress
Now for the fun part! Here’s how to construct the dress:
- Step 1: Shoulder Seams: With right sides together, sew the front and back shoulder seams using a 1/4 inch seam allowance. Press seams open.
- Step 2: Side Seams: Again with right sides together, sew the side seams from underarm to hem. Leave a small opening in the center back for turning (if needed).
- Step 3: Hem: Fold the hem edge twice (about 1/4 inch each fold) and stitch to create a clean finish.
- Step 4: Armholes: Fold the armhole edges twice toward the inside and stitch to create neat finishing.
- Step 5: Waist Elastic: Create a channel for the elastic by folding the waistline edge twice and stitching, leaving small openings on each side. Thread the elastic through and tie the ends together.
Creating the Festive Apron
This is the special touch that makes the dress perfect for Christmas:
- Cutting: Cut the apron pieces from white fabric according to your pattern.
- Interfacing: Apply the fusible interfacing to the wrong side of the apron front piece for stability.
- Hemming: Fold and stitch all raw edges of the apron pieces.
- Top Stitching: Add decorative topstitching in a Christmas-themed pattern (I did small snowflakes and dots).
- Attaching Strap: Create the apron strap by folding long strips of fabric in half lengthwise and stitching. Attach to the sides of the apron.
Adding the Christmas Touches
What makes this dress perfect for the holiday season? The special details:
- Ribbon Trim: Sew green ribbon along the hem of the dress for a pop of Christmas color.
- Pom-poms: Attach small red and green pom-poms along the neckline and at the waist for a festive look.
- Buttons: Add small decorative buttons along the front of the apron in a vertical line.
- Embellishments: Consider adding small fabric flowers or a tiny Christmas tree appliqué.
Grace’s Reaction and Fitting
The moment of truth came when I brought the completed dress to Grace. Her face lit up with pure joy as she carefully placed it on Sarah:
- Immediate Response: “Oh Mom, it’s perfect! Sarah looks like she’s ready for Christmas dinner with Grandma and Grandpa!”
- Dress-up Time: Grace spent the next hour creating stories for Sarah, complete with a Christmas party for her doll’s friends.
- Appreciation: “I love that you made this especially for Sarah. It fits her perfectly!”
- Future Plans: Grace immediately asked if I could make matching outfits for Sarah’s friends.
Tips for Success
Based on my experience making this doll dress, here are some helpful tips:
- Choose the Right Fabric: Cotton fabrics work best for beginners as they’re easy to handle and don’t slip as much as other materials.
- Precision Matters: Take your time with measuring and cutting. Doll clothes require more precision than full-size clothing.
- Test Fit Often: Check the fit on the doll throughout the process, especially after major construction steps.
- Simple Decorations: Start with basic embellishments. You can always add more complex details once you’re comfortable with basic construction.
- Involve Your Child: Let your child help with simple tasks like choosing fabrics or adding decorations.
- Start Simple: If this is your first doll clothing project, consider starting with a simple skirt before attempting a full dress.
Alternative Pattern Ideas
Now that you’ve made one dress, you might want to try variations:
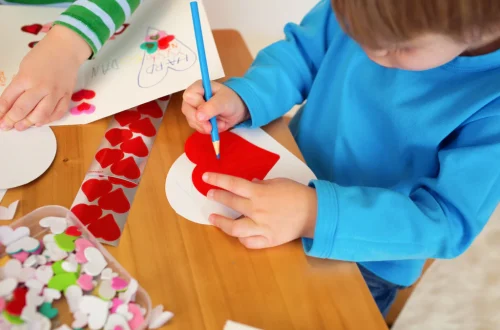
- Valentine’s Day Version: Use pink and red fabric with heart embellishments
- Easter Dress: Pastel colors with floral patterns
- Summer Outfit: A simple sundress with a colorful print
- Back-to-School Ensemble: A plaid dress with a coordinating cardigan
- Birthday Outfit: Special fabric with ribbon trim for celebrations
Storage and Care
To preserve your hand-sewn doll clothing:
- Storage: Store doll clothes in a small container with tissue paper to prevent wrinkles.
- Cleaning: Hand wash delicate doll clothes in cold water with gentle detergent.
- Repairs: Keep a small mending kit handy for quick repairs of loose buttons or small tears.
- Organization: Consider making garment bags for each of the doll’s outfits.
The Joy of Handmade
There’s something truly special about creating something with your own hands, especially when it brings joy to someone you love. This Christmas dress represents more than just fabric and thread—it’s an expression of love, creativity, and the special bond between mother and daughter.
Grace has already requested that we make matching Christmas pajamas for Sarah next year. I’m looking forward to many more crafting sessions with her, creating special items that will become part of our family traditions.
I hope this tutorial inspires you to try your hand at making clothes for your child’s dolls. The sense of accomplishment and the joy on your child’s face when they see something made just for their special doll is truly priceless. Happy crafting, and merry Christmas!